Dynamic Text & Dynamic Audio
We want to make it as easy for you as possible to produce your show. Dynamic Text & Audio help with that by enabling you to add pieces of content to your episodes (or to every new episode), with minimal effort.
You can for instance use this to:
Add an audio intro that you change every month
Add an audio disclaimer to each episode
Run an add at the beginning of your episode for a certain period
Always insert your call to action in your show-notes
And more…
Dynamic Text
Your episodes have a description. This shows up as show-notes in podcast apps and websites. You use this to tell listeners what your episode is about, provide them with links and relevant information, and drive them to your website and socials.
With dynamic text, you can easily insert text in your show-notes.
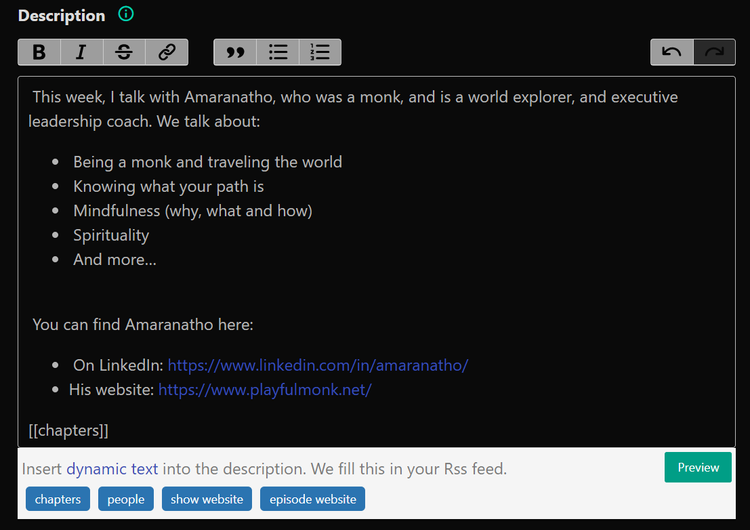
From your episode settings, you can add dynamic text in your description, by selecting the place in the description text, and clicking a Dynamic Text tag. We show several built-in tags, like chapters, people, show- and episode website.
These produce a text like [[chapters]] in your description. We use that to render the dynamic text in your RSS feed, and you can see what that looks like when you click Preview.
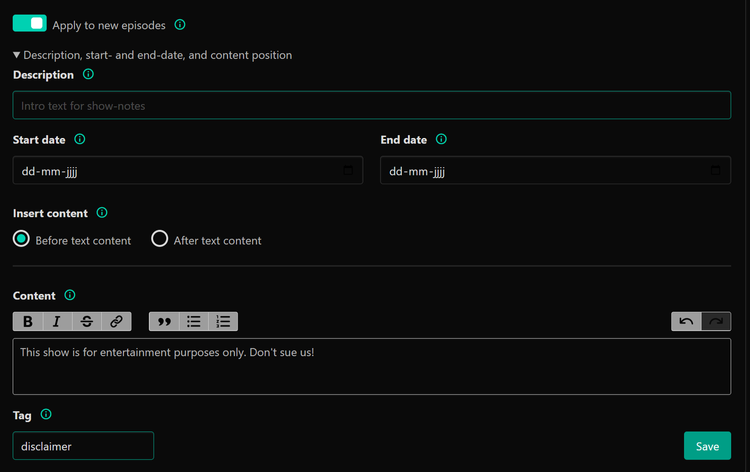
You can create your own Dynamic Text tags. You do that in the Dynamic content page.
Click “Add new Dynamic Text”
Fill in the content that you want the text to be
Enter a Tag. This will show up under your description text area in Episode settings
Click “Save”
Optionally, you can select Apply to new episodes, to automatically add the dynamic text to the description of new episodes. You can choose if it is inserted before or after any text. And you can indicate a start- and end-time when the text applies to new episodes.
You can add an unlimited number of Dynamic Text entries.
When you’ve added a Dynamic Text, you can select it, and see to which episodes it is applied. If you want, you can apply it to specific episodes by selecting them and clicking “Save episode links”. This also works to remove the dynamic text from episodes.
Dynamic Audio
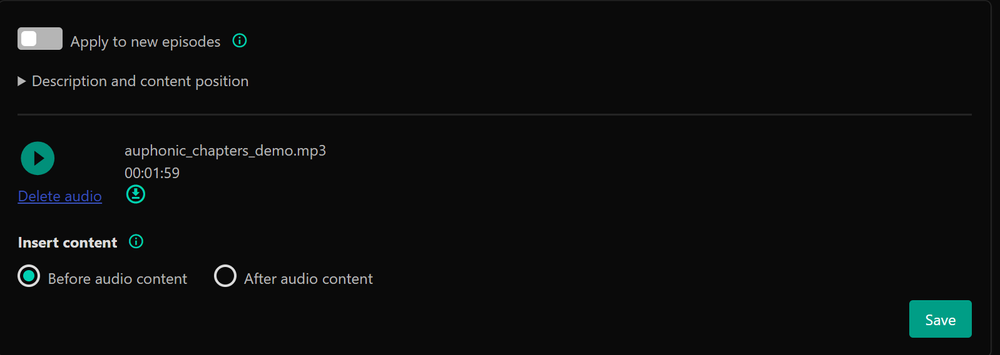
If you want to add an audio file before and/or after you episode audio, you use Dynamic Audio. You can find it in the Dynamic content page, under the Dynamic Audio tab.
Click “Add new Dynamic Audio”
Upload an audio file
This must be an MP3, and can be maximum 5 minutes long, and 10MB large
Optionally, you can use Audio Enhance on the audio file. Note that Audio Enhance is a paid feature where you pay per minute of audio uploaded
When the audio is processed, you can choose if you want it to be added before or after you episode audio, or at a custom time in your episode
Click “Save”
Optional, you can indicate that this audio applies to every new episode. And you can indicate a start- and end-time when the audio applies to new episodes
You can select a Dynamic Audio and apply it to specific episodes by clicking “Save Episode links”.
You can have multiple Dynamic Audio entries: one before audio content, and one after, and multiple at a custom time in your audio
You can change the audio file of a Dynamic Audio at any time
Adding Dynamic Audio can take a while and happens as a background process. We send you an email when it is applied to an episode
When we apply or remove a Dynamic Audio to an episode, we automatically recalculate everything in the episode that has a timing element, to make sure it still works: timing in transcript, chapters, value time splits, and clips
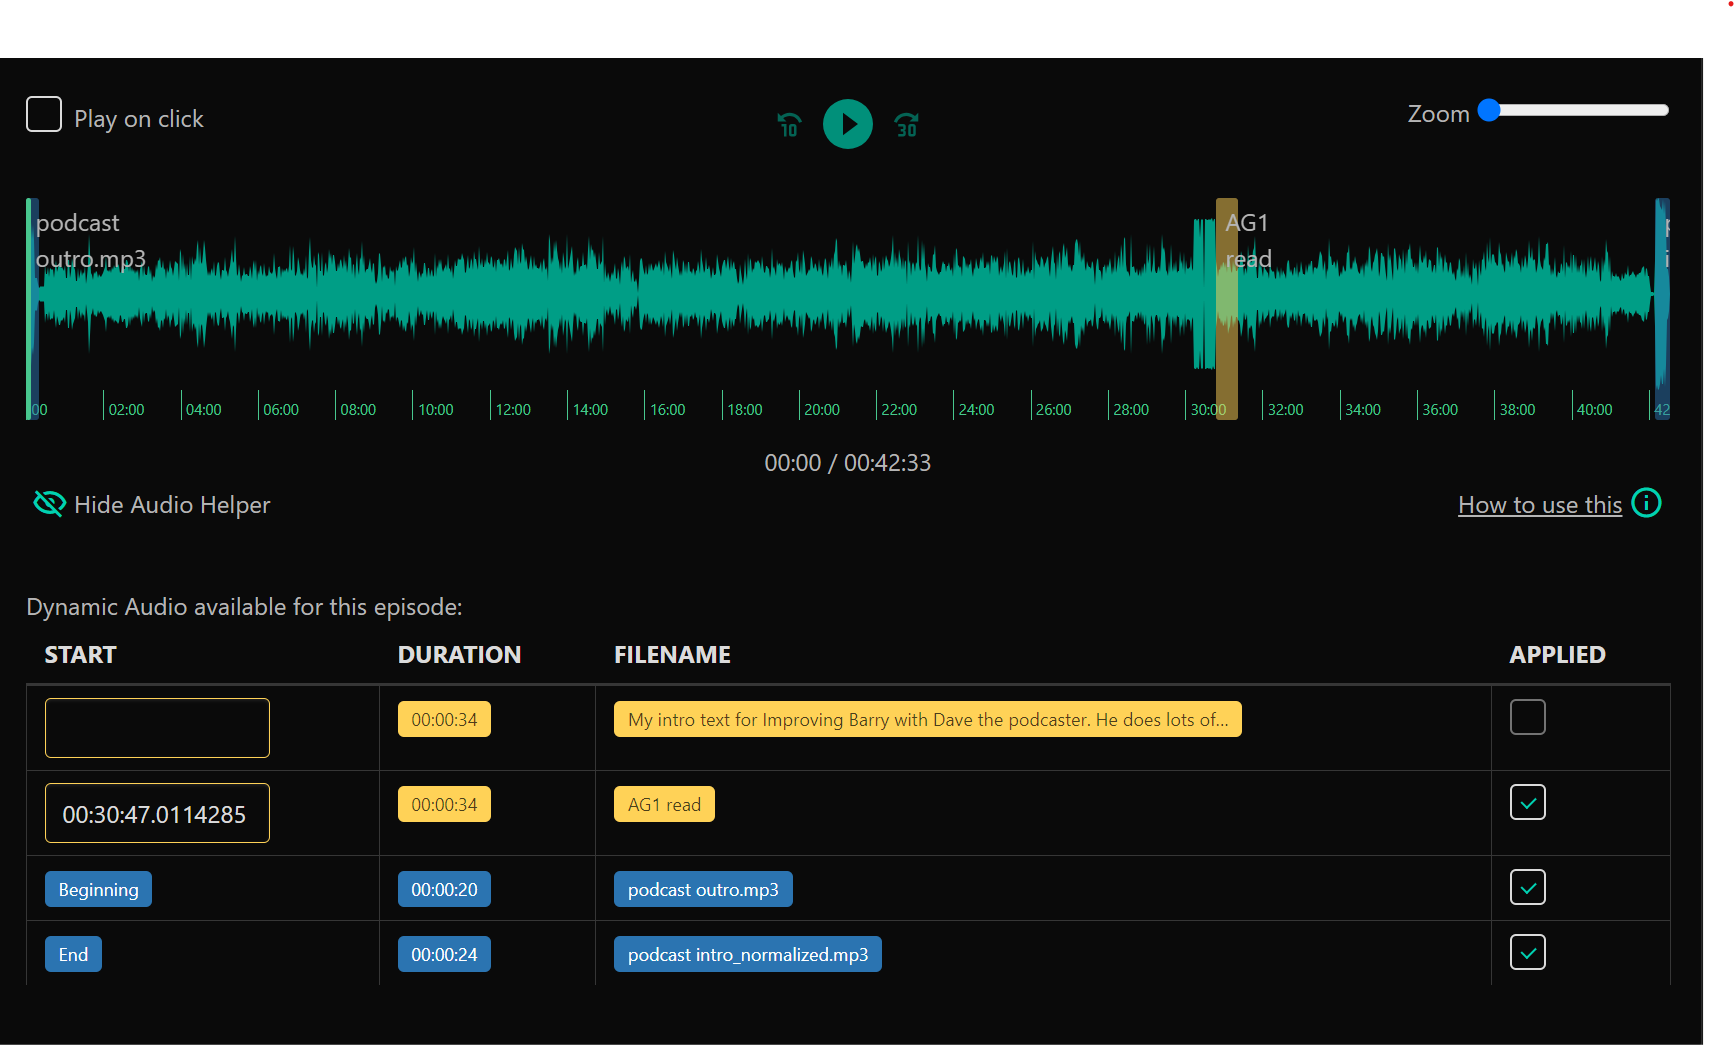
Dynamic Audio in Episode Settings
If you have configured Dynamic Audio for your show, it will show up in the Dynamic Audio Tab in your episode settings.
This enables you to see where Dynamic Audio is applied to your episode, and remove, apply, or move it.
The Dynamic Audio Tab is also the place where you insert Dynamic Audio entries with a Custom insertion point. Just drag the audio to the place you need it to be, apply it, and save your changes.